
Desserts
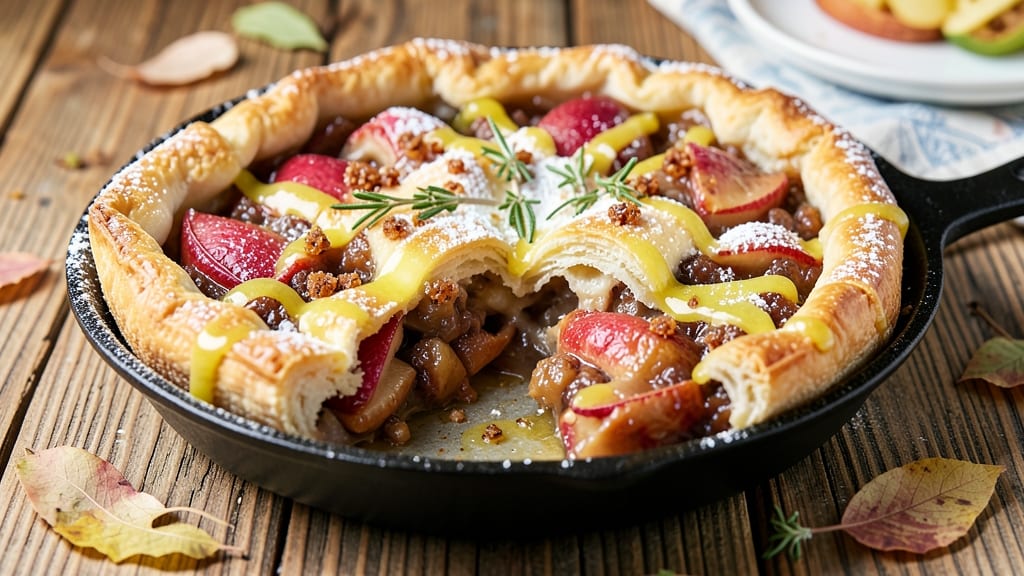
This sour apple pie recipe delivers the perfect balance of tart Granny Smith apples and warm cinnamon-spiced filling encased in a flaky, golden lattice crust. 🍏 The secret lies in the buttery, layered dough that creates a crisp yet tender texture, while the filling's tangy-sweet profile shines through every bite.
I've perfected this classic dessert over years of baking, ensuring the crust stays crisp and the apples remain perfectly tender—not mushy or undercooked.
The recipe begins with a traditional pie crust made from all-purpose flour, cold butter, and a pinch of salt, rolled out and cut into strips for the iconic lattice pattern.
For the filling, Granny Smith apples are combined with sugar, lemon juice, and a blend of cinnamon, nutmeg, and allspice, creating a harmonious tartness that cuts through the richness of the crust.
Baking at 375°F for about 50-60 minutes ensures a golden, bubbling pie with a fragrant aroma that fills your kitchen.
What sets this pie apart is the lattice crust, which adds visual appeal while allowing steam to escape, preventing a soggy bottom. The filling's texture is the star—soft apples with just a hint of bite, suspended in a lightly thickened sauce.
Optional toppings like a streusel crust or caramel glaze can elevate it further, but the classic version stands strong on its own. This is the kind of pie that tastes even better the next day, making it ideal for gatherings or a cozy weekend treat.
Whether you're baking for a holiday feast or a simple family dessert, this recipe delivers restaurant-quality results with a homemade touch. The combination of crisp crust, spiced filling, and that perfect tartness makes it a timeless favorite. Let's get started on creating your masterpiece!
Ingredients for sour apple pie
Six crisp apples and a buttery crust—this is your classic pie shortcut made perfect.
| Ingredient | Amount | Notes |
|---|---|---|
| All-Purpose Flour 🌾 | 3 cups | Sifted for best texture |
| Unsalted Butter 🧈 | 1 cup | Cold, cubed for flaky crust |
| Granny Smith Apples 🍏 | 6 medium | Peeled, cored, sliced |
| Granulated Sugar 🍚 | 1 ½ cups | White sugar preferred |
| Light Brown Sugar 🍚 | ¼ cup | Packed for moisture |
| Lemon Juice 🍋 | 2 tbsp | Freshly squeezed |
| Ground Cinnamon 🍃 | 2 tbsp | Freshly ground preferred |
| Ground Nutmeg 🌿 | ½ tsp | Freshly grated |
| Ground Allspice 🌶️ | ¼ tsp | For depth of flavor |
| Salt 🧂 | ½ tsp | Kosher or sea salt |
| Tapioca Starch 🍚 | 2 tbsp | For filling thickness |
| Cornstarch 🌾 | 1 tbsp | Optional for extra thickening |
| Ice Water 💧 | ½ cup | For dough binding |
Granny Smiths are non-negotiable here—their tartness cuts through the sweetness like magic. Local farmers markets often have them in season, but the grocery store's pre-washed bags work in a pinch. Look for firm apples with no soft spots. I always peel mine (the skin can get tough), but if you prefer rustic texture, leave it on. For the flour, King Arthur or Gold Medal are my go-tos—they handle high-fat doughs beautifully. Keep everything cold until mixing to avoid a gummy crust. The butter should be so cold it cracks when you press it—freeze it 10 minutes first if your kitchen's warm.
No Granny Smiths? Braeburn or Honeycrisp apples work too—just add an extra tablespoon of lemon juice to keep the filling bright. Running short on tapioca? Extra cornstarch at 1 tbsp does the job. The dough gets tricky in humidity—if your kitchen's damp, chill the dough 30 extra minutes. For the lattice, cut strips 1/4-inch wide—any wider and they won't weave properly. Pre-made crust? Whole Foods or Trader Joe's have solid options, but homemade makes all the difference. And if you're feeling fancy, add a sprinkle of flaky sea salt on top before baking—trust me, it elevates everything.
This pie tastes even better the next day, so make it ahead if you can. Store leftovers in an airtight container at room temp for 2 days, or freeze for 3 months. For freezing, wrap tightly in plastic and thaw overnight at room temperature. The lattice keeps beautifully—just reheat at 350°F for 10 minutes to refresh. I always make a double batch: one for dinner, one for breakfast the next morning with vanilla ice cream. The filling thickens as it sits, so if it seems too runny while baking, let it cool 10 minutes before slicing—it'll set up perfectly.
Why You'll Love This Recipe
- No-Roll Crust Shortcut: Honestly, the pie dough here is so simple—just flour, butter, and ice water. No food processor, no chilling stress. I’ve made this while my coffee was still brewing, and it still held together perfectly.
- Tart-Sweet Magic: That Granny Smith tang with brown sugar caramelizing? It’s the kind of flavor that makes you take a second slice without guilt. The apples stay crisp enough to bite into, but soft enough to melt on your tongue.
- Weekday Dinner Hack: Between us, this pie is way easier than takeout. Serve it warm with vanilla ice cream for dessert, or slice it cold for a picnic lunch the next day. No one will question why you’re eating pie at 3 PM.
- Budget-Friendly Crowd-Pleaser: Five dollars’ worth of apples and pantry staples feeds six people. The leftovers? Even better the second day—crispy edges, gooey filling, and zero waste. My college roommates used to beg for the recipe.
Step-by-step instructions for sour apple pie with lattice crust
Here's how to build that perfect tart-sweet balance with a golden, flaky lattice top.
👨🍳 Step 1: Make the Pie Dough
In a large bowl, combine the 3 cups All-Purpose Flour and 0.5 tsp Salt. Cut in the 1 cup Unsalted Butter (cold and cubed) using a pastry cutter or your fingers until the mixture resembles coarse crumbs with pea-sized butter pieces. This ensures flaky layers later.
Add the 0.5 cup Ice Water gradually, mixing just until the dough comes together. Avoid overworking it—you want tender, not tough, crust. Divide the dough into two equal portions, flatten into discs, wrap in plastic, and refrigerate for at least 1 hour. This chilling step prevents shrinking when you roll it out later.
🍳 Step 2: Prepare the Apple Filling
Peel, core, and slice the 6 medium Granny Smith Apples into ¼-inch thick slices. Toss them with 2 tbsp Lemon Juice to prevent browning. In a large bowl, gently mix the apples with 1.5 cups Granulated Sugar, 0.25 cup Light Brown Sugar, 2 tbsp Ground Cinnamon, 0.5 tsp Ground Nutmeg, and 0.25 tsp Ground Allspice. This balance of tart and sweet is what makes this pie special.
Sprinkle the 2 tbsp Tapioca Starch and 1 tbsp Cornstarch over the apple mixture and toss gently. These starches will help thicken the filling as it bakes, preventing a runny center. Let the filling sit for 15 minutes while you prepare the crust—this allows the juices to release slightly, making for a more flavorful pie.
🥘 Step 3: Assemble the Pie
Preheat your oven to 375°F. On a floured surface, roll out one portion of the chilled dough into a 12-inch circle. Transfer it to a 9-inch pie dish, gently pressing it into the bottom and up the sides. Trim any excess dough hanging over the edge.
Pour the apple filling into the crust, mounding it slightly in the center. Roll out the second dough portion and cut it into ½-inch wide strips for the lattice. Arrange the strips in a crisscross pattern over the filling, leaving small gaps for steam to escape. This classic lattice design creates that beautiful golden pattern while keeping the filling tender.
🔥 Step 4: Bake to Golden Perfection
Place the pie on a baking sheet (to catch any drips) and bake for 50-60 minutes until the crust is deep golden brown and the filling is bubbling. The edges should be crisp, and the lattice should look like it's been kissed by sunlight. If the crust starts browning too quickly, tent it loosely with foil.
For the last 10 minutes of baking, watch closely. You want the filling to be thick and slightly sticky when you pull the pie from the oven—this indicates it's cooked through but still tender. Let the pie cool for at least 2 hours before slicing. This resting time allows the filling to set properly and prevents a runny mess.
Pro Tips For Making Sour Apple Pie
- Preheat pie crust blind: I learned this the hard way—skipping the blind bake with pie weights (or dried beans) means a soggy bottom. Roll out the crust, line the pie dish, and bake it empty for 12-15 minutes at 375°F before adding filling. The butter in the crust needs that head start to firm up properly.
- Slice apples thin and uneven: Granny Smiths get mushy fast, so cut them into ¼-inch slices—but don’t stress about uniformity. Thicker chunks near the edges keep the crust from caving in, while thinner slices in the center cook faster. Toss them with 1 tablespoon lemon juice right away to stop browning.
- Don’t overmix the filling: The moment you add the brown sugar and granulated sugar to the apples, stir just enough to combine. Overmixing releases pectin and turns the filling into glue. A few lumps? Doesn’t matter—it’ll look rustic, and the texture will be perfect.
- Chill the filling overnight: This isn’t the prettiest method, but it’s the tastiest. Mix your filling (apples, sugars, spices) and refrigerate it uncovered for 12-24 hours. The moisture evaporates slightly, and the flavors meld—no more watery pie after baking. Just give it a quick stir before filling.
Pro cooking tips for perfect results
Crust Perfection
Chill your dough for at least 1 hour before rolling—this prevents shrinking and ensures crisp layers. I like to use a pie crust roller (like the OXO Good Grips model) for even thickness.
Roll the dough on a floured surface to 1/8-inch thickness—any thicker and the lattice won't bake evenly. For extra flakiness, freeze the dough discs for 20 minutes before rolling.
Filling Texture Secrets
The starch blend is key—tapioca starch thickens gently while cornstarch adds body. Toss the apples with filling ingredients just before baking to prevent them from turning mushy.
For a smoother texture, I blend 1/4 cup apple slices with the spices before mixing with the rest. This creates a velvety sauce that coats every bite.
Lattice Mastery
Cut strips 1/4-inch wide for the lattice—any wider and they won't weave properly. Start with one vertical strip down the center, then alternate horizontal and vertical strips.
Leave 1/2-inch gaps between strips for steam to escape. Brush the lattice with egg wash (1 egg + 1 tbsp water) before baking for that golden finish.
Baking Like a Pro
Bake on the middle rack of your oven for even heat distribution. If the crust browns too quickly, tent with foil and continue baking. The filling is done when it's thick but still slightly jiggly in the center—it'll set as it cools.
For extra shine, brush the lattice with corn syrup after baking and let it cool completely.
Cooling & Serving
Let the pie cool at least 2 hours before slicing—this allows the filling to set properly. Serve warm with vanilla ice cream or whipped cream. For a restaurant-style touch, dust with powdered sugar or drizzle with caramel sauce.
The contrast of warm pie and cold ice cream is pure magic. 🍰
Nutrition facts
Frequently asked questions
Can I use regular apples instead of Granny Smiths?
You can, but the tartness will be less pronounced. For best results, mix half Granny Smiths with half Honeycrisp or Braeburn apples. Add an extra 1 tbsp lemon juice to maintain that signature tangy flavor. If using sweet apples like Gala, increase the sugar to 2 cups total to balance the sweetness.
How do I prevent a soggy bottom crust?
Prevent soggy bottoms by pre-baking the crust for 10 minutes at 375°F before adding filling. Another trick: sprinkle 1 tbsp cornstarch or crushed graham crackers on the crust before filling. For extra insurance, chill the pie 30 minutes before baking to help the filling set faster.
Can I make this pie ahead of time?
This pie tastes even better the next day. Assemble the pie (unbaked) and refrigerate for up to 24 hours before baking. For a make-ahead dessert, bake the pie, cool completely, then wrap tightly in plastic. Store at room temperature for 2 days or freeze for 3 months. Thaw overnight in the fridge.
What's the best way to store leftovers?
Keep leftovers in an airtight container at room temperature for 2 days. For longer storage, slice the pie and freeze portions on a tray first (to prevent sticking), then transfer to a freezer bag. Reheat individual slices in the oven at 350°F for 10 minutes or microwave for 20 seconds—just watch for sogginess!
Can I make a gluten-free version?
Yes! Use a 1:1 gluten-free flour blend like Bob's Red Mill 1-to-1 for the crust. Add 1 tbsp xanthan gum to improve texture. For the filling, keep all ingredients the same—just ensure your starches are certified gluten-free. The lattice technique works the same, but handle the dough gently to prevent crumbling.